Rubber seals provide your home with an air-tight barrier that stops warm air from escaping and cold air from entering. This is not only useful from a purely financial standpoint, as your heating will not have to work as hard, but it’s also good for your health as seals provide better ventilation.
However, with time, your rubber seals can become less effective due to natural wear and tear. If you are reading this, you might have some of the following problems:
- You run your hand along the edges of the door and feel some parts are colder than others;
- You are moving into a new property and noticed that the uPVC door is missing some pieces of its sealing;
- You’ve checked Google for a replacement seal, but the choice is overwhelming;
- After a few years of living in a property, you now feel a draft from one of your uPVC doors.
If that is the case and you want to know how to replace the rubber seal on a uPVC door, then read along!
- Buy a new seal
- Remove the old rubber seal
- How to replace rubber seal on a uPVC door
Buy a new seal
Before you order a new seal, you should first learn exactly what kind you need. All rubber seals look alike, except for one major difference: the shape of the insert which slides into the frame of the door. It can be angled, round, and even T-shaped. There are also flat seals and instead of sliding them into the door frame, you simply glue them on.
To check what kind of seal you have, you will need to remove a tiny part of it. Remove only a small part though, as you do not want to leave your uPVC door without any sealing while waiting for the spare to arrive. Here is how to do it:
- Pull out a small section from its slot, with your fingers. About 5 centimetres are quite enough.
- Cut the section off using scissors.
- If your seal is glued to the door, peel it off with a utility knife.
Seals come in standard sizes for standard-sized doors – 91 cm by 203 cm (36 by 80 inches). If you have a custom made door, you should measure its height and width to find out how long a seal you need. You can always buy a slightly longer seal and cut it to the right length, rather than the other way around.
Remove the old rubber seal
Fortunately, when you replace the rubber seal on your uPVC door, you don’t actually have to remove the door.
- Leave the door wide open.
- Put a door stopper underneath the door, so it doesn’t move.
- Pull the old rubber seal out by hand. It should come out easily.
- If you stumble upon a sector of the seal that doesn’t want to come out, work your way around it and finally pull the whole thing from the door.
- If the seal is glued on, slide a blade between it and the door frame. It should come off easily as manufacturers often use weak glue for door seals.
Use a cloth dipped in soapy water and wipe all way around the door. This will remove any dirt or grease and help the new seal fit more easily. If there was glue on the door, it can be removed with some WD-40.
Need a Handyman?
Find a professional to take care of your uPVC door seal.
- We’re certified:

How to replace rubber seal on a uPVC door
You don’t need tools to follow these instructions; however, a flathead screwdriver might come in handy for sharp angles and corners.
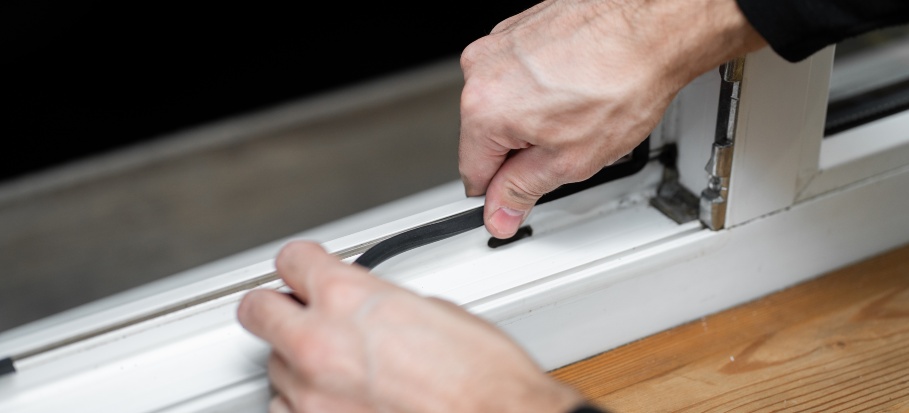
- Start from the middle of the door, preferably from where it closes. It will be more comfortable to start from your own height rather than the top or bottom.
- Take one end of the rubber seal.
- Press the seal gently into the slot in the frame.
- When you’re done inserting the seal, try to pull it out gently. If it doesn’t fall off, you’ve done a good job. If it does move or come out, you’ll need to reinsert it all over again.
This is how to replace a rubber seal that has adhesive.
- Take a strip of seal and peel of a section of the backing adhesive. It’s important you do it that way, instead of removing all the adhesive backing all at once.
- Make your way along the doorstop, pressing the seal down firmly as you go and peeling off section after section.
After you’re done with the fitting of the new rubber seal, cut the excess off with a pair of scissors.
Call the professionals
If you don’t have time or patience to carry out this task, then consider contacting the professionals. Fantastic Services works with experienced and fully equipped handymen in London. They will advise you on the best type of rubber seal and fit it in a stress-free manner.
Takeaways
- Remove only a part of the old seal to find out what replacement to buy.
- Clean the surface before inserting the new seal.
- If you have an adhesive seal, peel off the back one section at a time whilst fitting.
***
Looks like you’re about to replace your rubber seal as well. Did you follow all the steps? Was there something we missed? Let us know by leaving a comment
Image source: Shutterstock / Try_my_best